
Staying ahead of the competition is crucial in today’s drastically evolving business landscape. Every organization is pursuing innovative strategies to enhance efficiency and productivity. IFS Cloud is one crucial piece of the enterprise digitalization journey, and with Microsoft Power Apps serving as the integration platform, it is possible to build mobile apps or automate business processes enriched with AI capabilities.
What is Power Apps?
PowerApps is an enterprise low-code application platform by Microsoft, and it provides a rapid development environment to build custom business apps without the need for coding expertise. Using Power Apps, you can create cross platform business applications through a simple drag-and-drop interface, workflow automation and pre-built AI models.
Power Apps and IFS Cloud
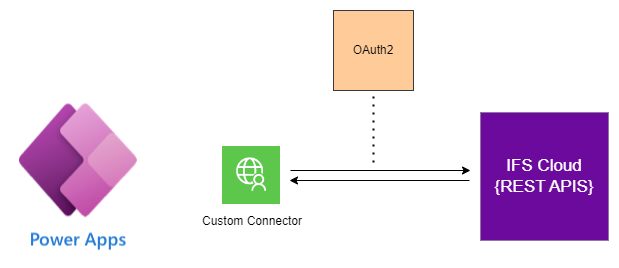
With the API driven architecture of IFS Cloud, extending on the outside and seamlessly integrating external systems like Power Apps is a breeze. Power Apps enable connecting to other external systems using connectors and we could create a custom connector to integrate IFS Cloud according to the needs.
In this post, we’ll discuss on how to connect IFS Cloud with Power Apps platform and create a simple, custom-made mobile app within few minutes!
Microsoft Power Apps documentation is a good starting point to setting up everything you need to develop on Power Apps. If you are new to Power Apps, it’s better to spend some time on reading the concept and setting up Power Apps platform for developments.
In this article we’ll discuss following key topics.
- IFS Projections and Custom Connector
- Create IAM client for Authentication
- Creating the Power Apps Custom Connector
- Creating the Power Apps Mobile Application
- Summary
IFS Projections and Custom Connector
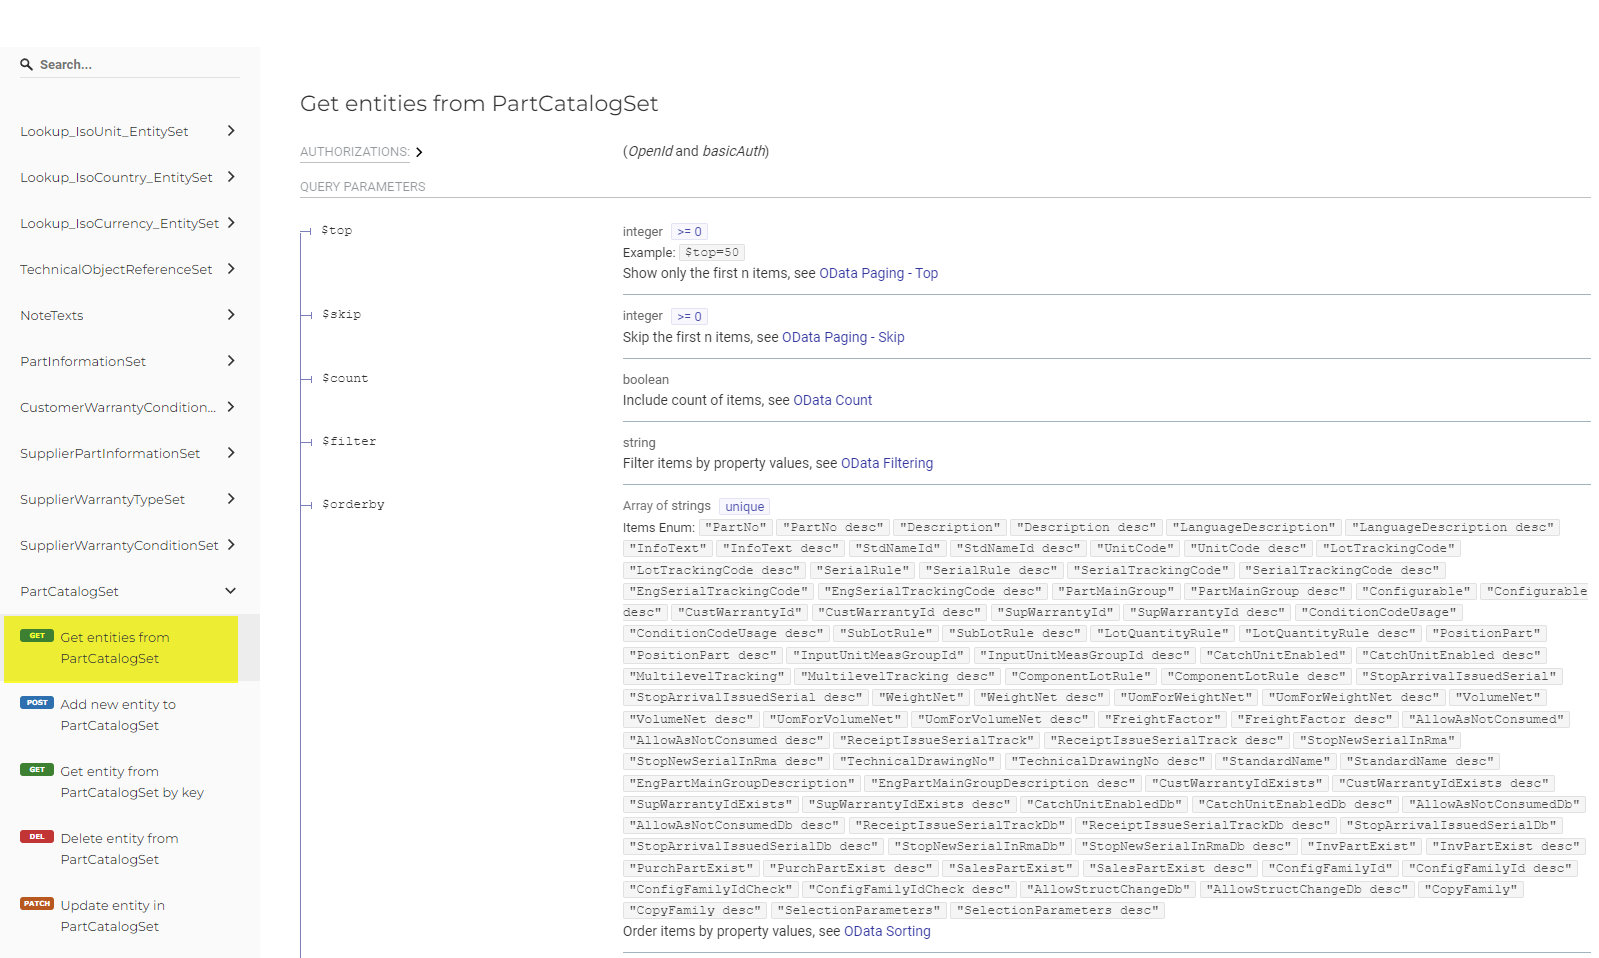
Key component of connecting PowerApps to IFS is the custom connector. A custom connector is a wrapper around a REST API that allows Logic Apps, Power Automate, or Power Apps to communicate with 3rd party APIs. In IFS terms, a Projection is equivalent to a RESTful API and you can find all the information about the API specifications, documentation using API Explorer in IFS Cloud.
There are two ways to create the custom connector for an IFS projection.
- Build the custom connector using the OpenAPI specification which can be found in API explorer
- Identify the projection calls you need for the integration and build the connector from scratch
OpenAPI specification for an IFS projection is usually heavy with many API operations which covers a business functionality within IFS Cloud. If we create the Power Apps connector using projection OpenAPI specification, you could end up creating a connector with many unwanted operations. Therefore, the best approach is to identify specific API operations and create the connector from the scratch according to your needs.
In this example, we are planning to create a simple Power Apps mobile application where a user can search a Master Part in IFS Cloud by description and get the part details.
As the first step, we can simulate what we need in our app in IFS Cloud to find the information we need using the log window or browser network debugger
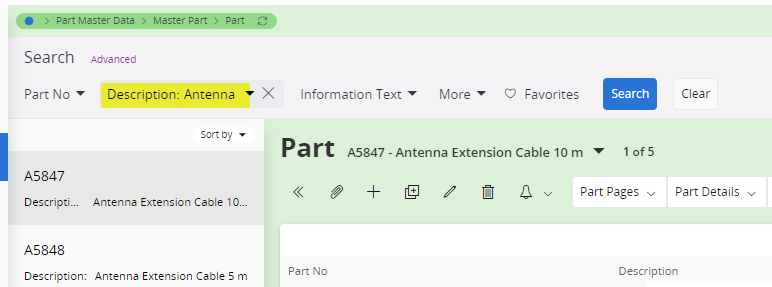
- IFS Projection: PartHandling.svc
- Projection Operation: PartCatalogSet
- HTTP Verb: GET
We can use the API documentation in IFS Cloud API explorer to identify the URL, request/response samples and HTTP headers which are required to make the request from a 3rd party application
Create IAM client for Authentication
Now we have identified the API operations we need to build the connector. Next step is to create the IAM client in IFS Cloud for authentication. We are building an app for IFS end users, where a user must authenticate with IFS for using the app. This can be done by using the End User Authentication (Authorization Code Flow).
Go to IFS Cloud > IAM Client Details, create a new client. Give a client ID, description and save.
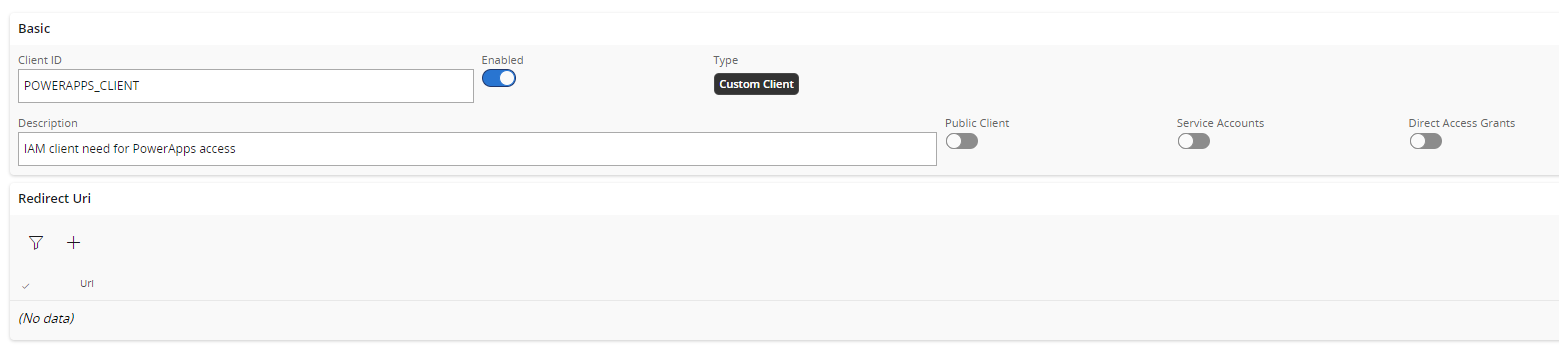
Keep the Redirect Uri blank for now. We will fill this after creating the custom connector. Copy the secret after creating the IAM client to be used in the PowerApps connector.
Creating the Power Apps Custom Connector
Next step is to start building the connector in Power Apps platform to connect to the IFS Projection and the operation we have identified above.
Microsoft documentation Create a custom connector from scratch is a good starting point to understand what a custom connector is and all the prerequisites needed for building one.
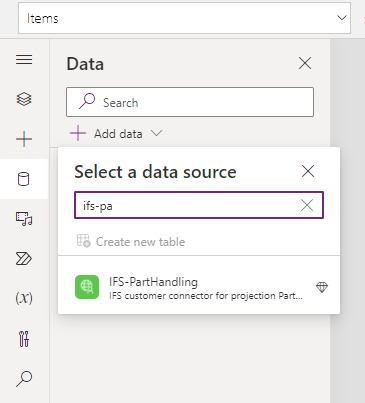
Go to your PowerApps environment and in the left panel, go to More > Discover All
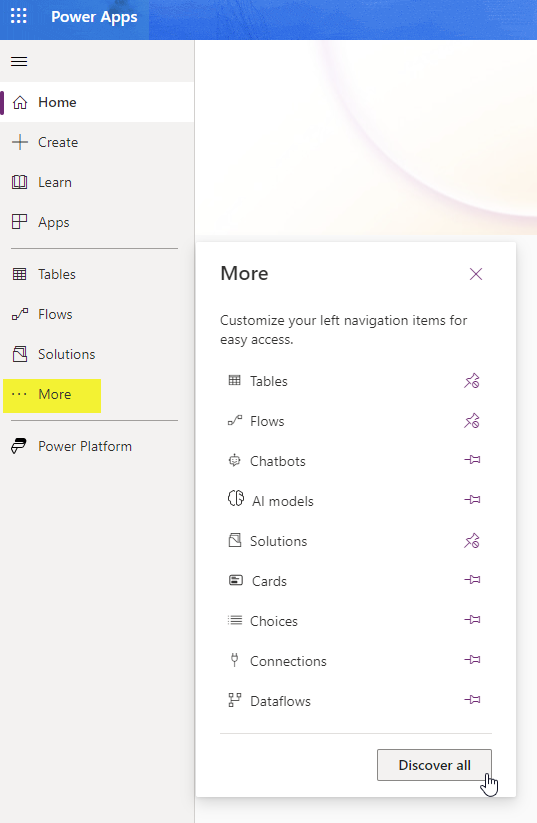
On the discover page, you could see the link to custom connector inside the Data card.
On the New custom connector dropdown, select Create from blank.
![]()
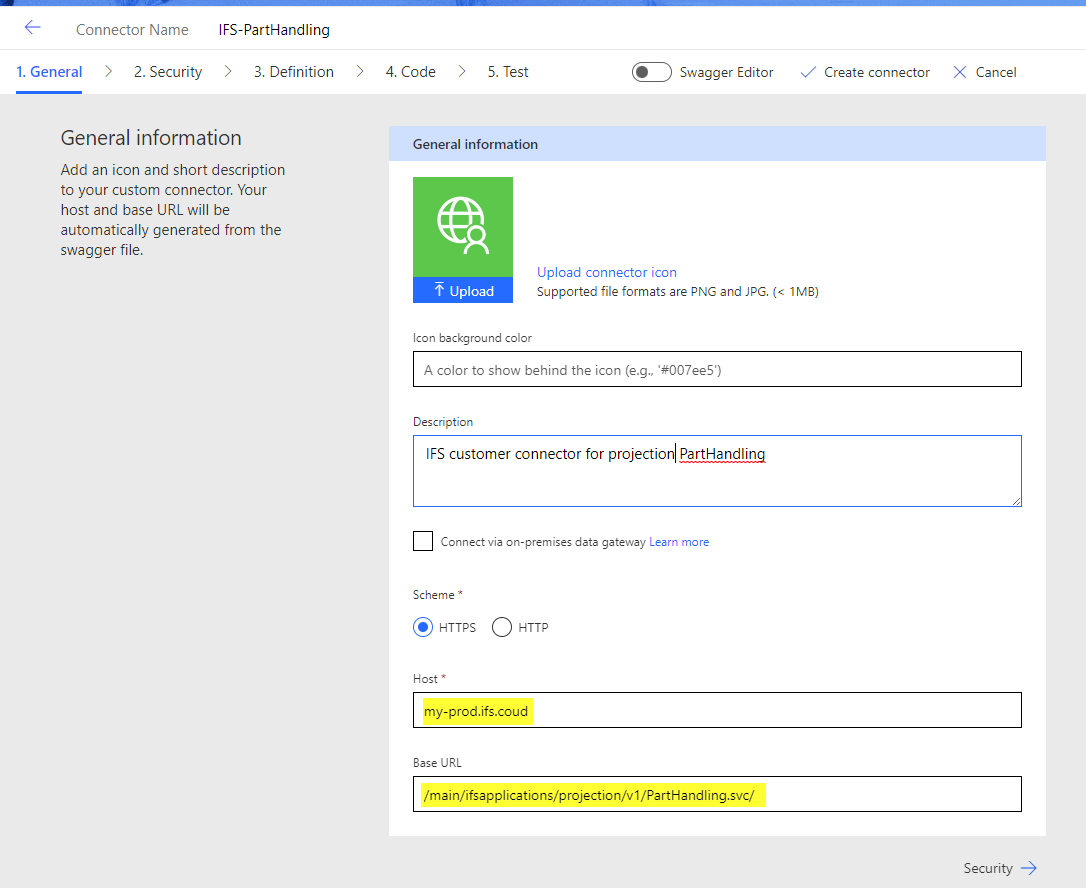
Give a name for custom connector and in the wizard, enter the host and path to the projection in the General Information
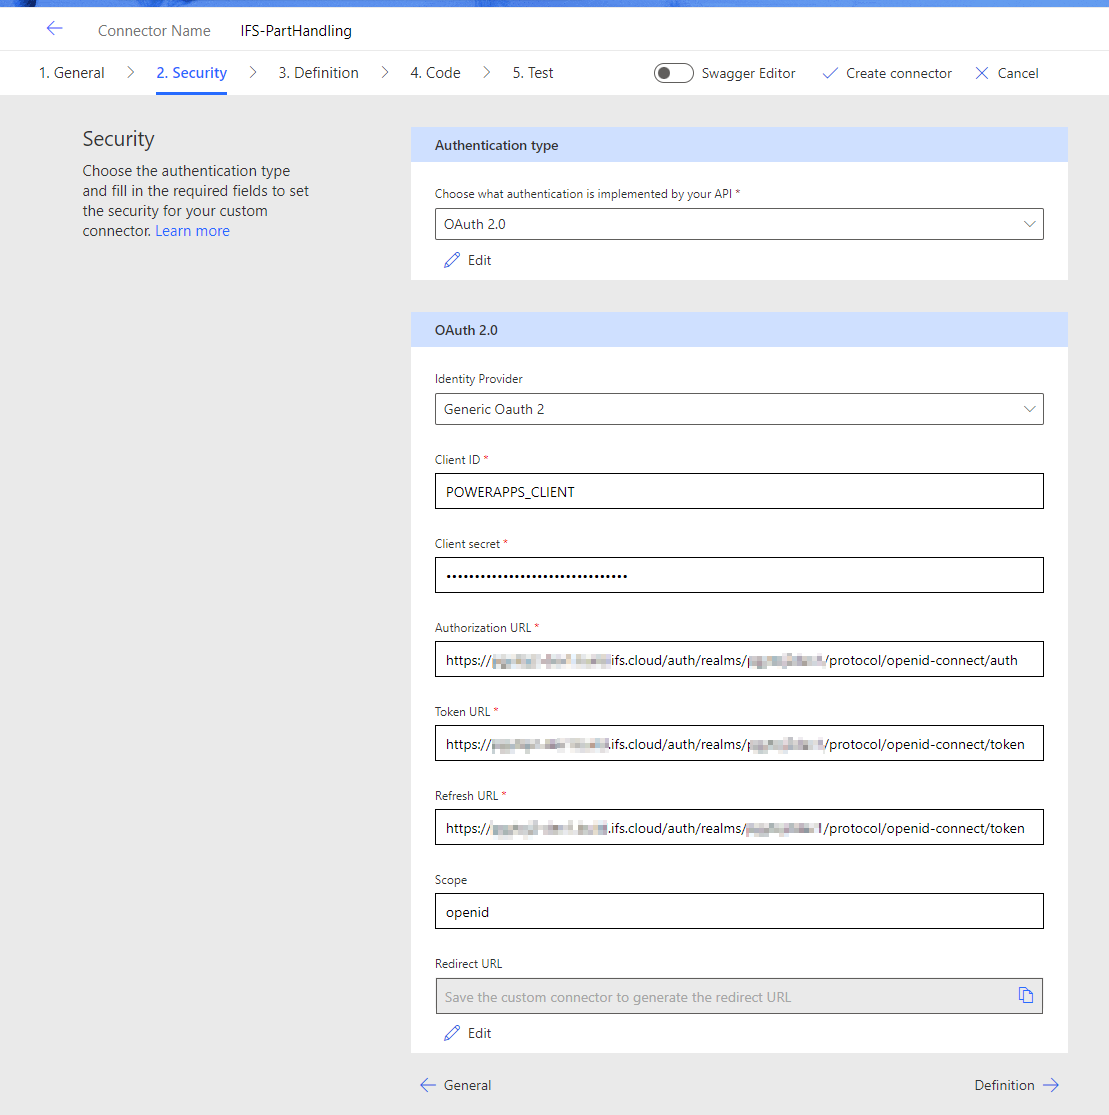
In the Security step, choose OAuth 2.0 as authentication type.
Fill the client ID and secret from the IAM client which we created above. Enter the Authorization, Token and Refresh URLs.
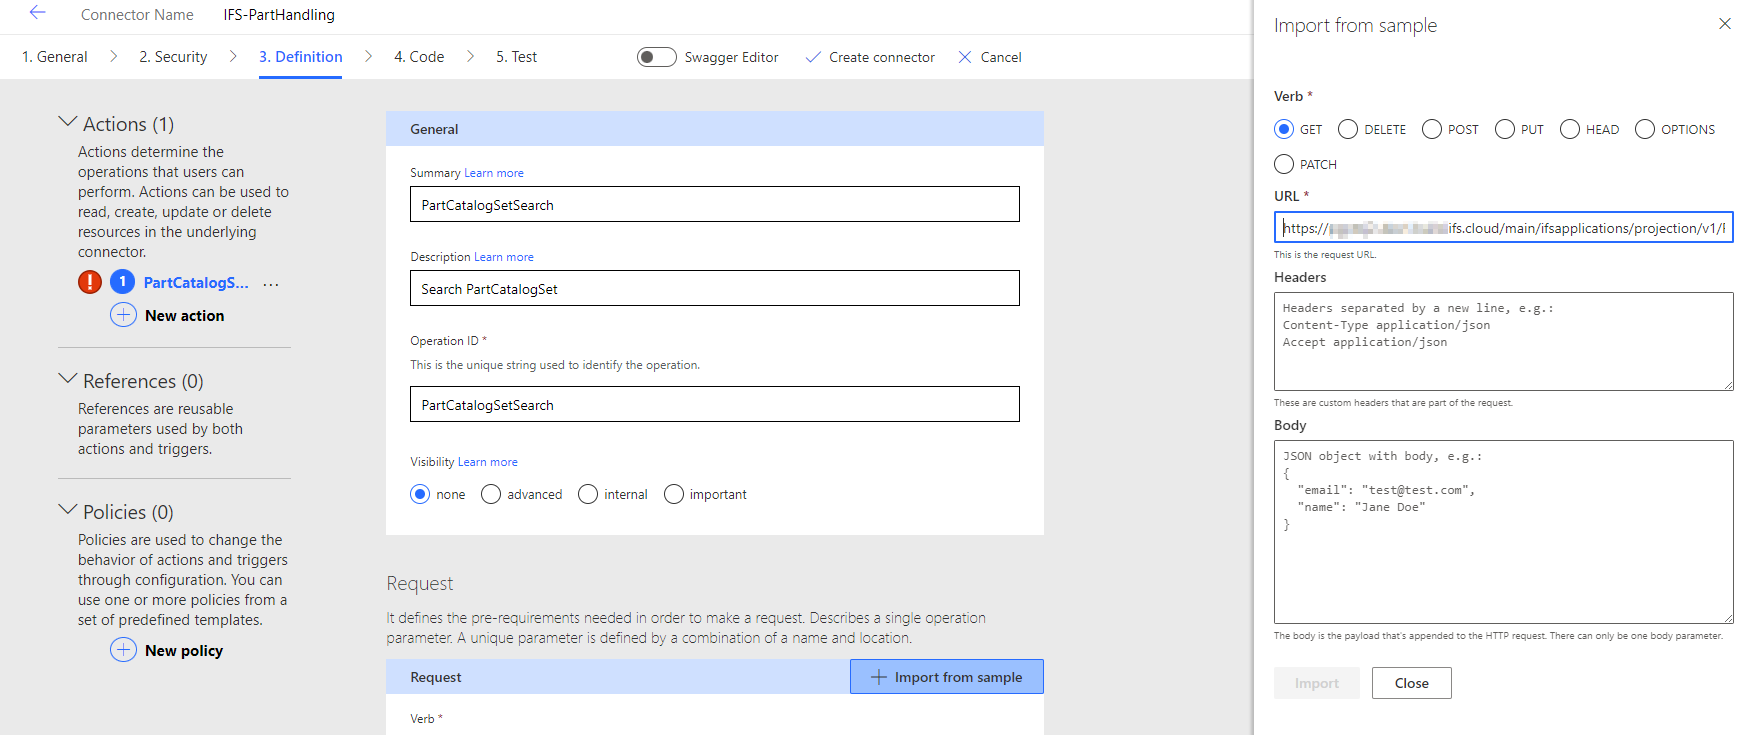
In the Definitions step, you can add the API operations for the connector.
We have only one operation in our connector, which is to search part by description
- Operation ID: PartCatalogSetSearch
- Request: Use Import from sample and paste the projection call to search part by description.
https://your-ifs-host/main/ifsapplications/projection/v1/PartHandling.svc/PartCatalogSet?$filter=(startswith(tolower(Description),'mf'))
- Verb: GET
In the Response section, use add default response and paste a sample response from projection API documentation.
Press the Create connector on the wizard to finish the setup.
Upon creating the connector, it will reveal the Redirect URL in the security tab. copy that and add as Redirect Uri in IFS IAM client created above.
Now it’s time to test our connector! Go to the Test tab and Create a New connection. If everything is setup correctly, you will be directed to IFS login screen. enter credentials and create a new connection. Use the same filter condition and see if you can see the response.

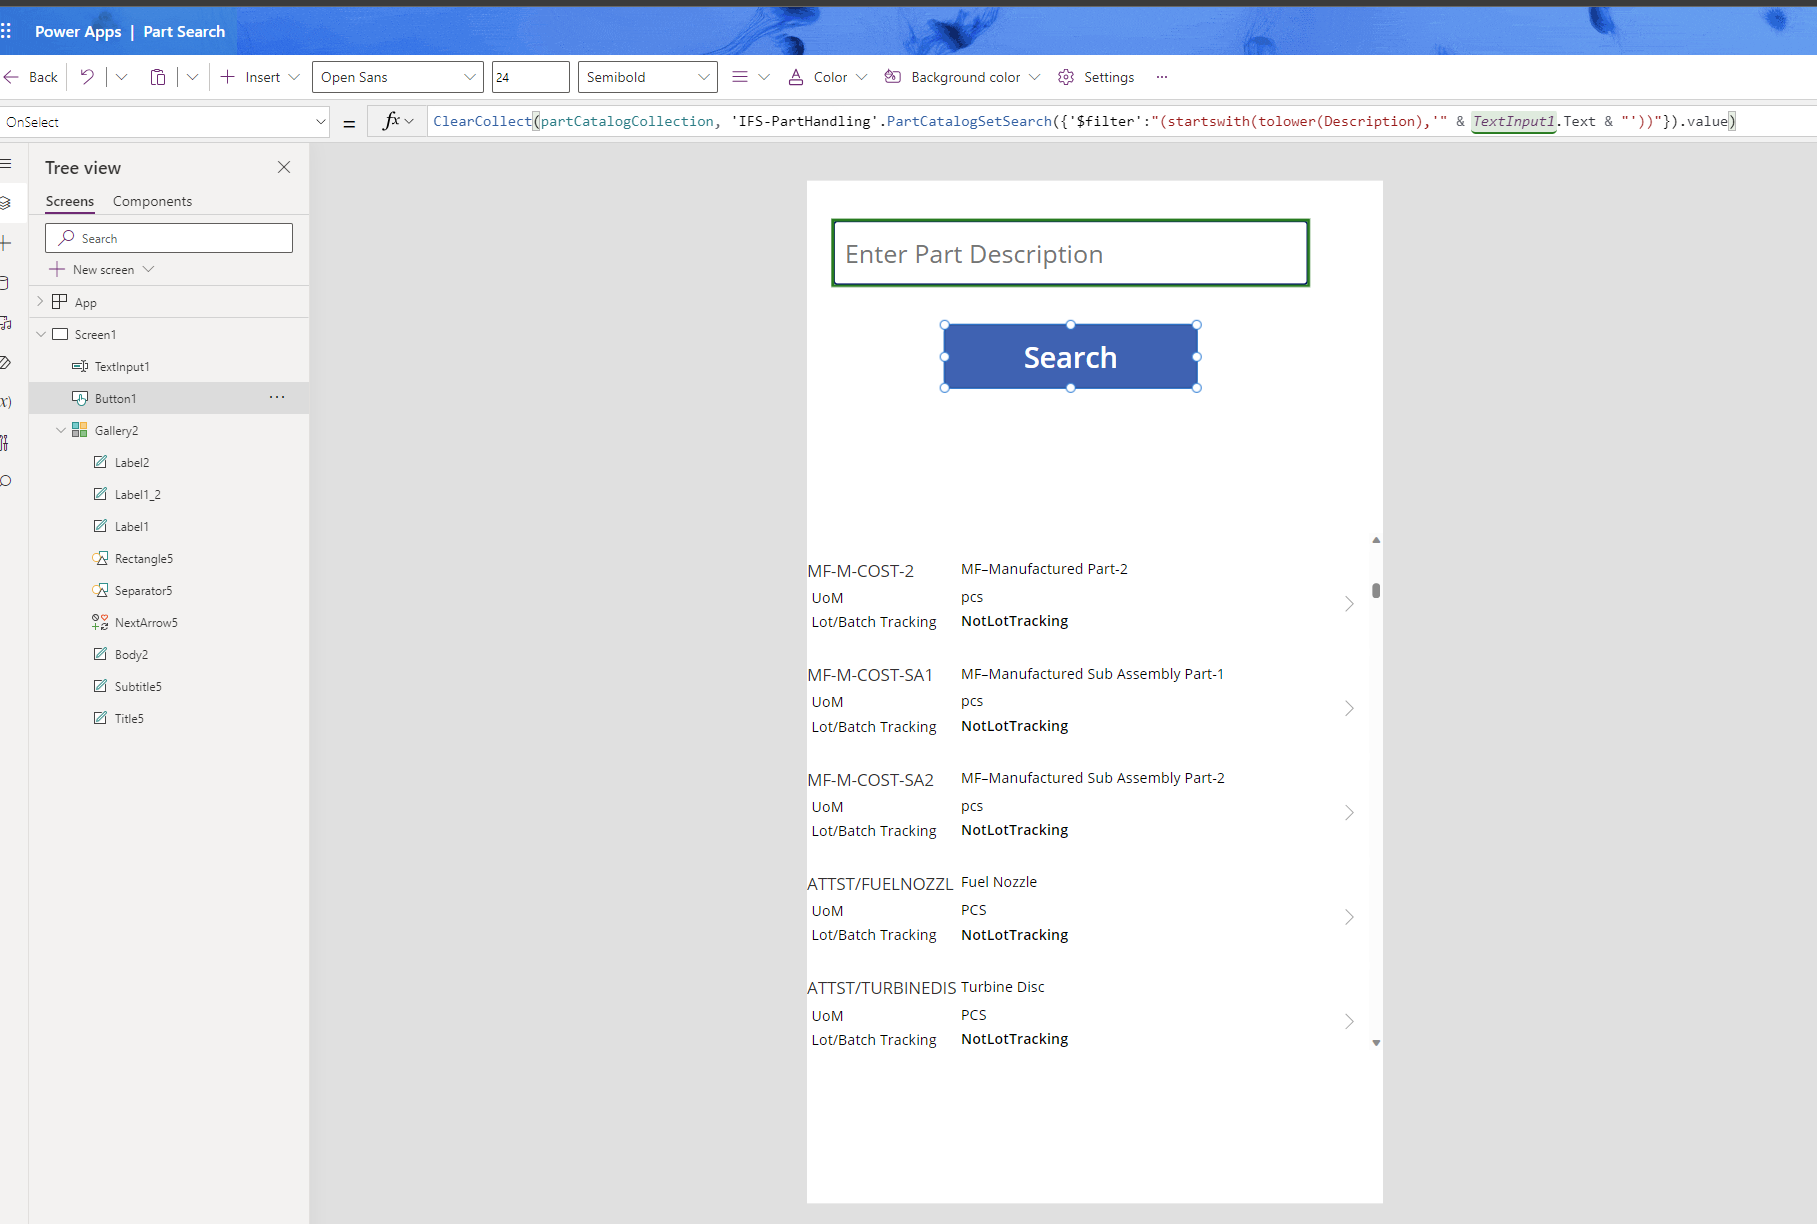
Creating the PowerApps mobile App
It’s time to create the app. We are creating a Canvas App with a gallery and not going into details on how to create the app since there are tons of material can be found to create power apps.
On the Data section, select the connector we created and add as a data source.
Our App has a Text Input to enter the part description, a search button and a vertical gallery to show the response data.
In the Button function, We can call the PartCatalogSetSearch operation in the custom connector and put the response in a collection named partCatalogCollection.
Button function:
ClearCollect(partCatalogCollection, 'IFS-PartHandling'.PartCatalogSetSearch({'$filter':"(startswith(tolower(Description),'" & TextInput1.Text & "'))"}).value)
Set the data source of the vertical gallery to partCatalogCollection and then you can add fields from the result set.
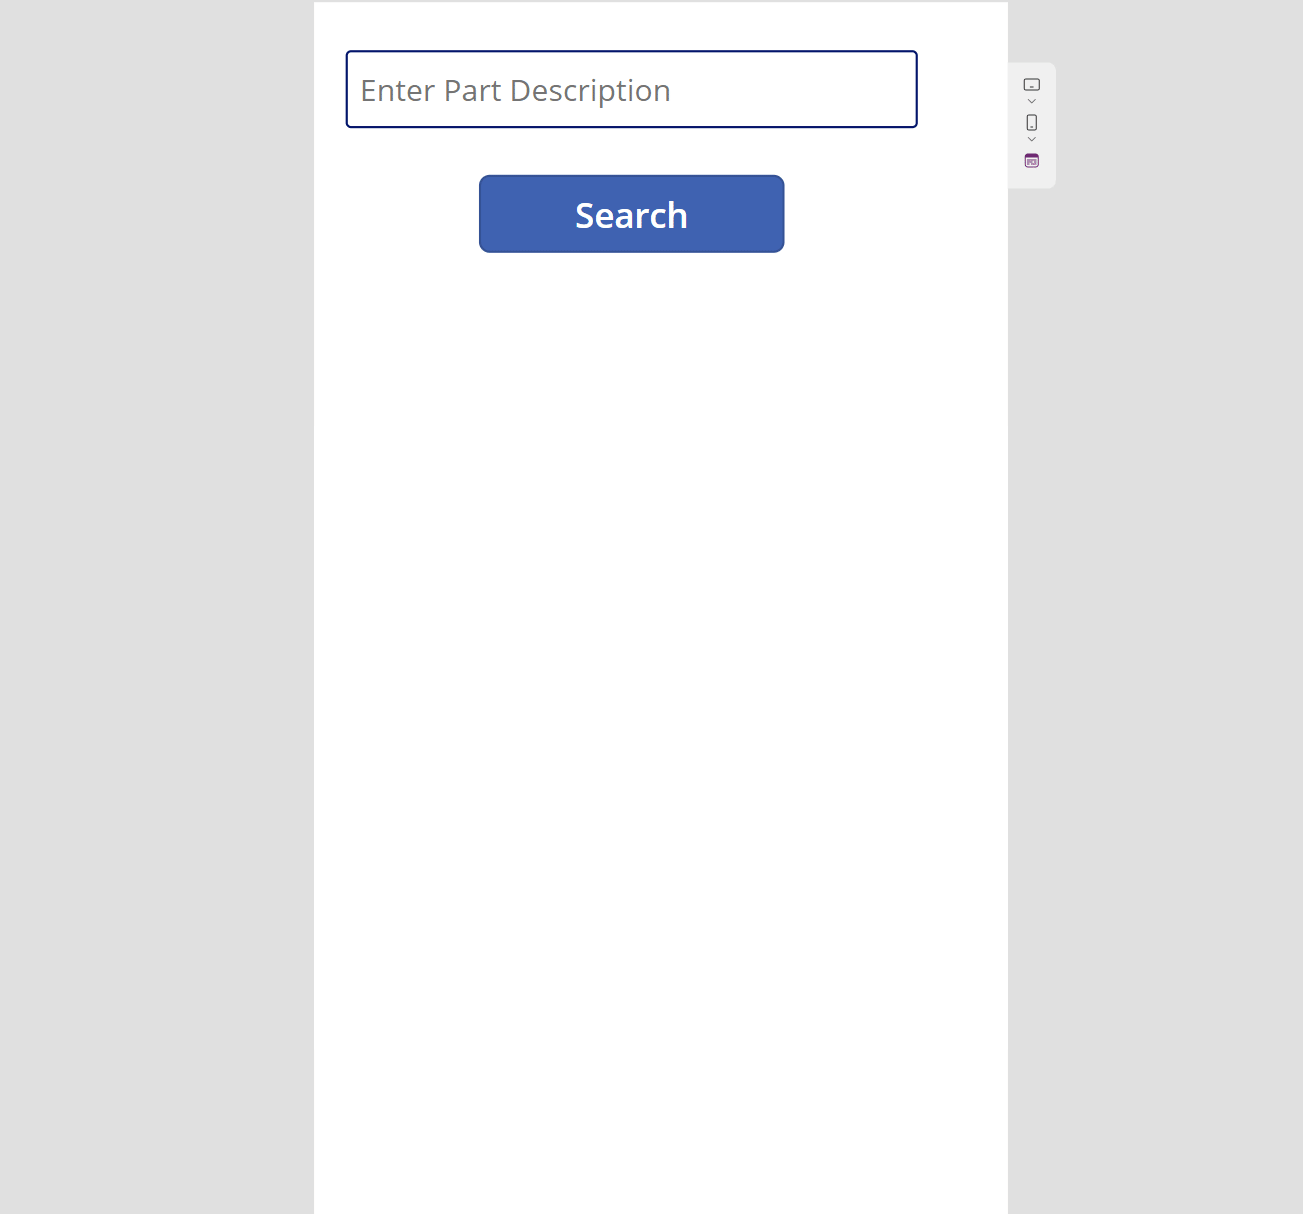
Now it’s time to test the app in action!
Save, and Preview the app (F5). Change the layout to mobile to see the real feeling of your app 🙂
Once the app is completed, it’s possible to Publish and distribute to the other users in the organization.
Summary
By integrating IFS Cloud with Power Apps, you can unleash the potential of the Microsoft platform and build tailor-made applications for your organization and user requirements. Power Platform has over 600+ connectors if you need to couple with other systems and pre-built AI models to cater your unique business needs.
At Align Consulting, we are experts in leveraging the cutting-edge extendibility capabilities of IFS Cloud to seamlessly integrate with powerhouse platforms like Power Apps. We are there to help crafting bespoke, industry-grade applications that perfectly align with your unique business needs and fit for the future🚀.
Contact us today to learn more and embark on your innovation journey💡.
By
Damith Jinasena